
Virtual Class Studio · 17 November 2026
Virtual Class Studio Setup: Step-by-Step Guide for Schools
Plan a virtual class studio for your school or ed-tech startup: room, acoustics, lighting, camera, audio, teaching tools and workflow, explained step by step.
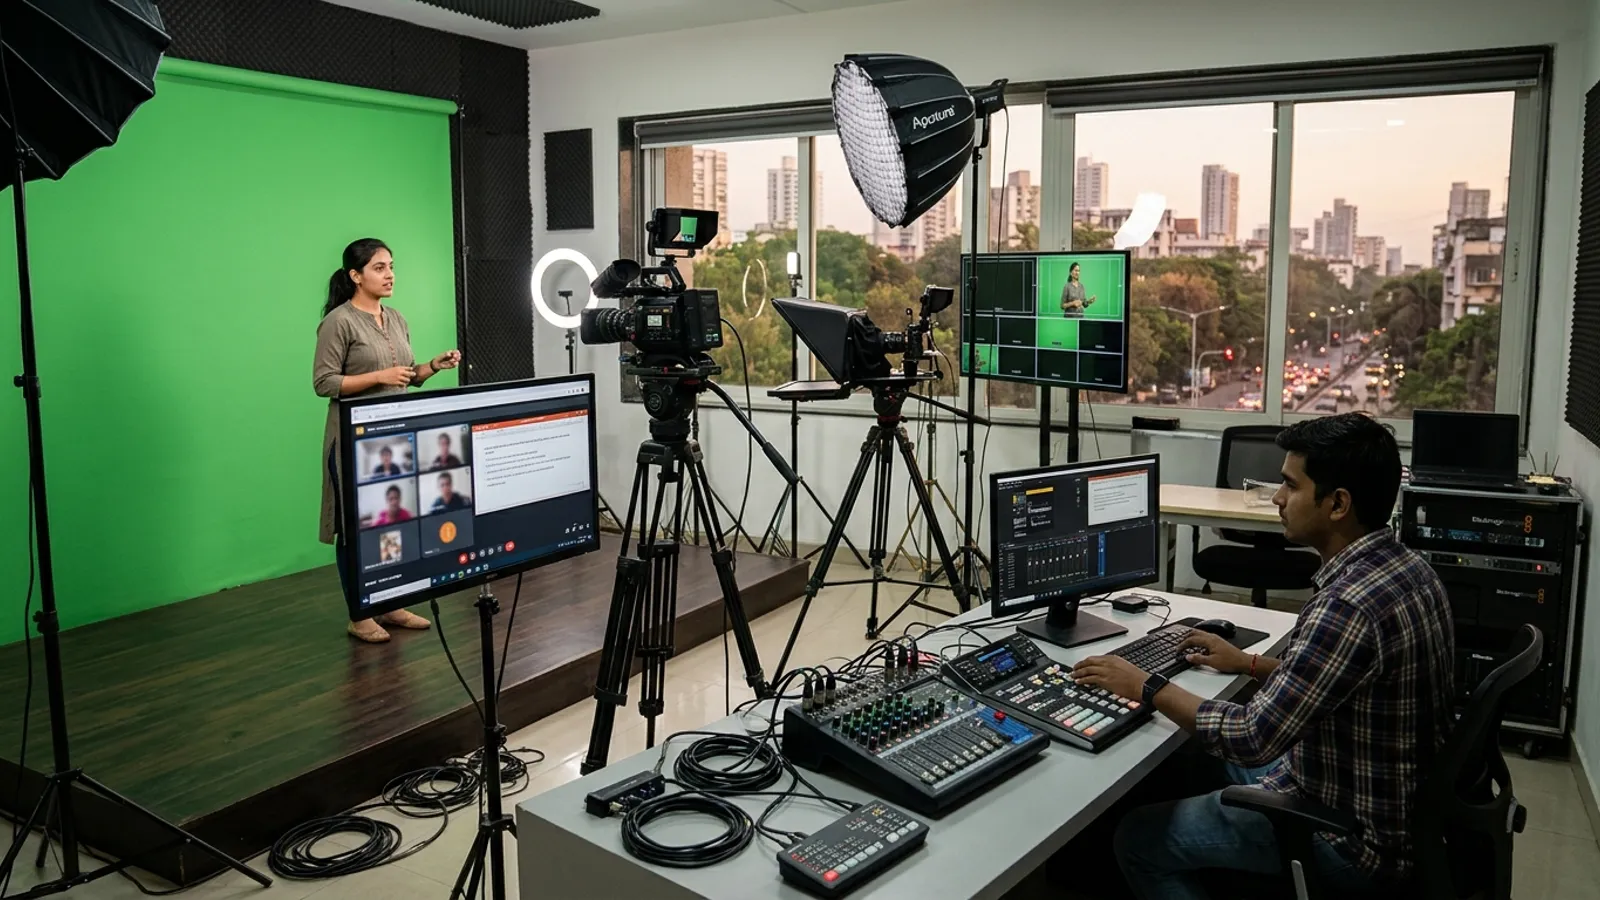 AI-generated illustration
Quick answer
A virtual class studio is a dedicated, quiet room set up for teaching on camera. It can include a camera, microphone, lighting, a writing tool such as a pen tablet or interactive display, and a simple backdrop. Start with the room and sound, then add lighting, camera and teaching tools, and finally test the whole workflow with a real class.
What is a virtual class studio, and who needs one?
A virtual class studio is a space built for delivering lessons online, either live or recorded. Unlike a corner of a staff room, it is planned so that the teacher looks good, sounds clear and can teach without technical distractions.
It suits:
- Schools that run online or hybrid classes regularly
- Coaching institutes that teach large batches remotely
- Ed-tech startups that produce recorded courses and live sessions
- Individual educators who want a professional, repeatable setup
How do you plan a virtual class studio step by step?
Follow these steps in order. Skipping ahead to buying cameras before fixing the room is a common and costly mistake.
Step 1: Define how you will teach
Your teaching style decides your equipment. Ask:
- Will the teacher mostly talk, or write and solve problems?
- Will classes be live, recorded, or both?
- Will one teacher use the room, or several in rotation?
- Do you need slides, a whiteboard, or a digital pen on screen?
A maths teacher who writes solutions needs a different setup from a language teacher who mostly speaks and shows slides.
Step 2: Choose the right room
Pick a room away from street noise, corridors, generators and loud air conditioners. A small, quiet room is often better than a large echoey hall.
Check these points:
- Is it away from traffic, playground and canteen noise?
- Is there enough power supply and internet access nearby?
- Can you control daylight with curtains or blinds?
- Is there space for the teacher, camera, lights and a few cables?
Step 3: Treat the room acoustics
Poor sound makes students switch off faster than average video. Hard walls, glass and bare floors cause echo. Acoustic treatment can include:
- Acoustic panels on side and back walls
- Heavy curtains or soft furnishings
- Carpet or rugs on the floor
- Door seals to reduce outside noise
You do not need to cover every surface. Treating the reflection points around the teacher usually makes a big difference. A studio planner can assess your room and suggest what is practical.
Step 4: Plan the lighting
Good lighting makes the teacher look clear and keeps students focused. A basic setup can include:
- A key light in front, slightly to one side of the camera
- A fill light to soften shadows on the other side
- A back light to separate the teacher from the background (optional)
Use soft, diffused lights rather than harsh bulbs. Avoid mixing strong window light with studio lights, because colours and brightness will keep changing during the day.
Step 5: Select the camera
Many teachers start with a good webcam, while others prefer a DSLR or mirrorless camera, or a PTZ camera for hybrid classrooms. The right choice depends on your budget, the number of camera angles and how much movement the teacher needs.
Keep the camera at eye level, framed from chest or waist up. If you want a second angle for a whiteboard or a demonstration, plan for it early so cabling and switching are ready.
Step 6: Get the audio right
Audio matters more than video for learning. Options can include:
- Lavalier (lapel) microphone for teachers who move around
- Shotgun or condenser microphone for fixed-position teaching
- USB or XLR audio interface to connect professional microphones
- Headphones for monitoring live classes
Test the microphone in the actual room. A good mic in an echoey room still sounds poor.
Step 7: Add your teaching tools
This is where a virtual class studio becomes more than a video room. Depending on your subjects, it can include:
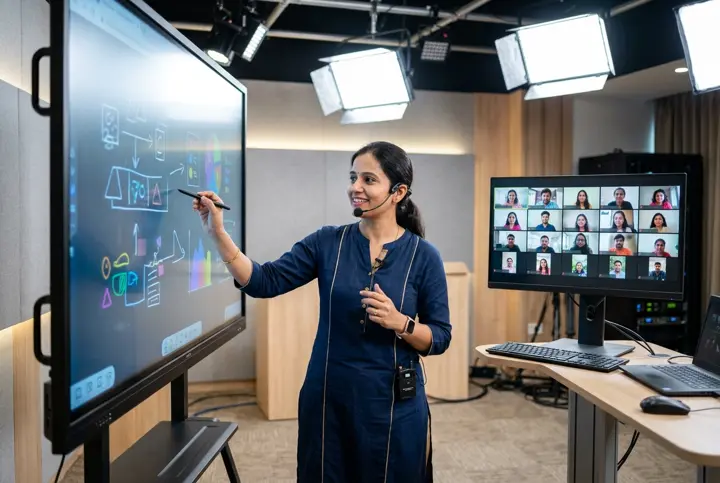
- Pen tablet or pen display for writing and solving problems on screen
- Interactive display or smart board for a classroom-like feel
- Green chroma backdrop to place slides, animations or branded scenes behind the teacher
- Teleprompter for scripted recorded lessons
- Confidence monitor so the teacher can see students or slides while looking near the camera
You do not need all of these. Pick what your lessons actually use.
Step 8: Set up software and workflow
Equipment alone does not make a smooth class. Decide on:
- The platform for live classes (for example, Zoom, Google Meet or Microsoft Teams)
- Recording and streaming software that can mix camera, slides and writing screen
- A simple file-naming and storage system for recordings
- Who starts the session, monitors chat and handles technical issues
For schools, a short checklist pinned in the studio helps any teacher run a class without calling IT every time.
What equipment can a virtual class studio include?
Here is a simple guide to what to consider at each level of setup.
| Area | Basic setup | Advanced setup |
|---|---|---|
| Camera | Good webcam or single camera | Multiple cameras, PTZ camera |
| Audio | Lavalier or USB microphone | XLR microphone with audio interface and mixer |
| Lighting | Two soft lights | Three-point lighting with controllable intensity |
| Writing tool | Pen tablet | Pen display or interactive display |
| Backdrop | Plain wall or fabric | Green chroma with virtual sets |
| Acoustics | Curtains, carpet, a few panels | Planned panel and absorber layout |
What mistakes should schools and ed-tech startups avoid?
- Buying gear before fixing the room. Echo and noise cannot be solved with a costly camera.
- Ignoring power and internet. Plan dedicated sockets and, wherever possible, a wired internet connection.
- Overcomplicating the setup. If teachers find it hard to use, they will avoid it.
- Skipping tests. Run a full mock class before launch, with a real student-side view.
- Forgetting future growth. Leave room in the layout and wiring for another camera or teacher station.
FAQ
How much space do I need for a virtual class studio?
A small, quiet room can be enough for a single teacher with a camera, lights and a writing tool. The right size depends on whether you use a chroma backdrop, a whiteboard or multiple cameras. A site visit or room photos help a planner suggest a practical layout.
Can one studio be used by multiple teachers?
Yes. Many schools and institutes share one studio across subjects and timetables. Keep the setup simple, label the controls, and save presets for camera position, lighting and audio so each teacher can start quickly.
Do I need a green screen for online teaching?
No, it is optional. A clean, neat backdrop works well for most classes. A green chroma screen is useful if you want to show slides, diagrams or branded visuals behind the teacher, or if you are producing polished recorded courses.
Ready to plan your virtual class studio?
Every school and ed-tech team has a different room, subject mix and budget. Smart Infovision can help you plan the layout, acoustics, lighting, equipment and workflow around your needs. Request a studio quote from Smart Infovision to get started.
 Related setupExplore Virtual Class Studios )}
Quote
Request your studio quote
Tell us about your room and the studio you have in mind. The Smart InfoVision sales team will get back to you to plan the next step.
Helpful to share
- Your name and city
- The studio type you have in mind
- Room size and layout
- Equipment you already own
- Budget and timeline, if you have them