
Virtual Class Studio · 16 November 2026
Virtual Class Studio: Switch Camera, Slides & Whiteboard Smoothly
Plan a virtual class studio where teachers switch between camera, slides and whiteboard smoothly, without breaking the flow of the lesson.
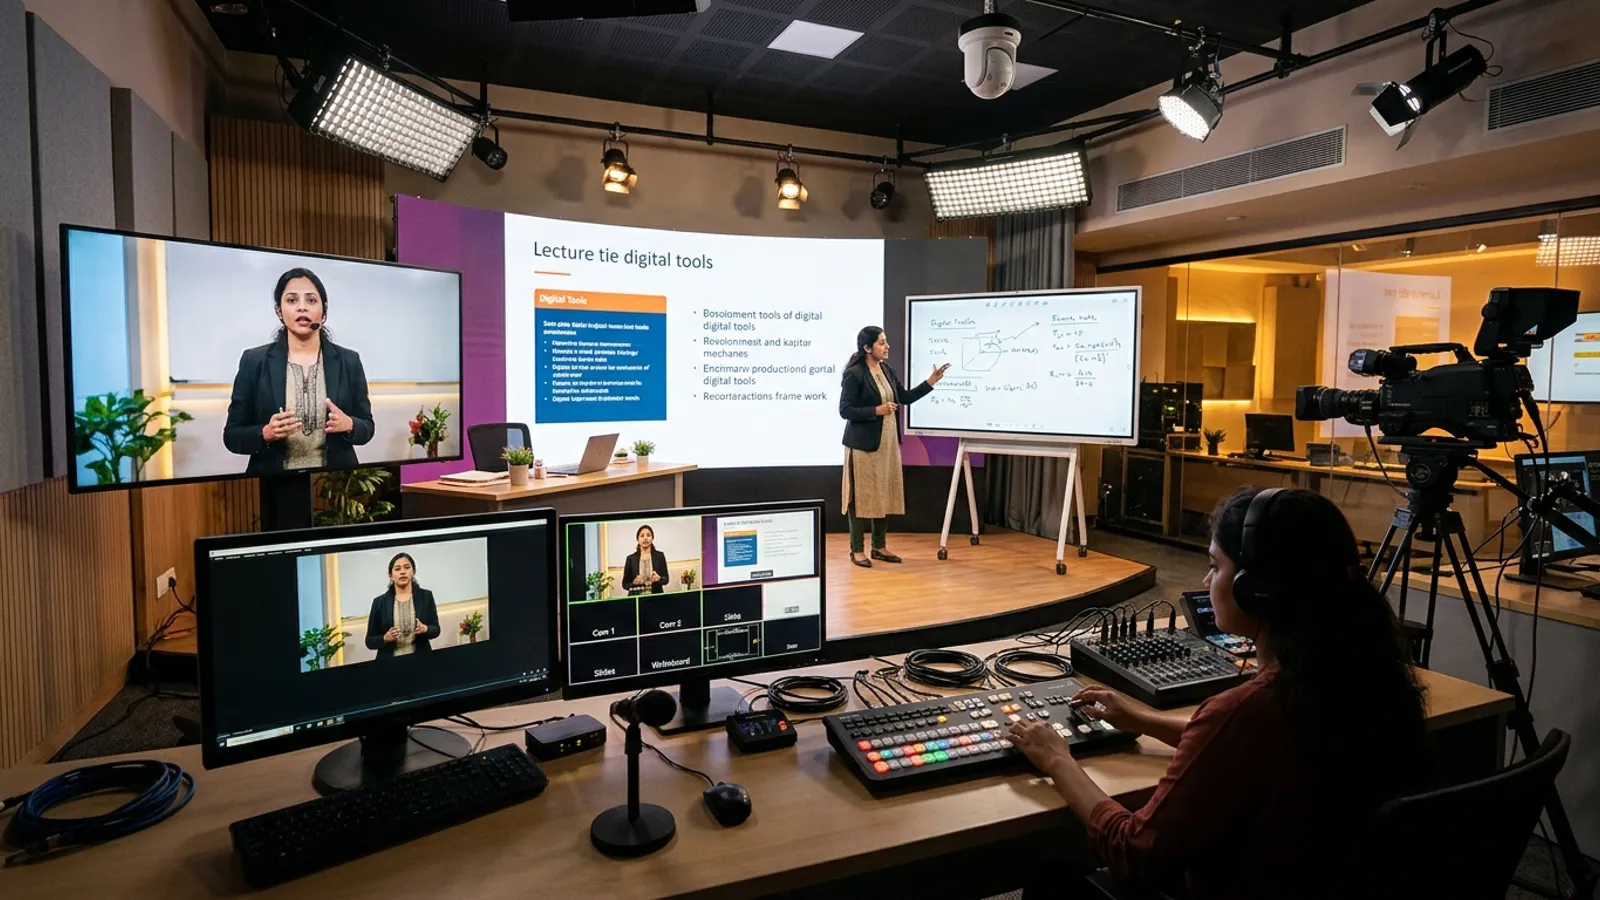 AI-generated illustration
Quick answer
To switch smoothly, send every source (camera, slides and whiteboard) into one switching system, either software scenes or a hardware video switcher. Then give the teacher a simple way to trigger each view, such as a shortcut pad, a clicker or an operator. Keep audio on a separate, steady path so the voice never changes when the picture does.
What does a virtual class studio need for seamless switching?
Think of the studio as three "sources" and one "mixer". The teacher teaches, and the mixer decides what students see.
The camera source
A fixed camera on the teacher is the base of the setup. It can include a webcam, a DSLR/mirrorless camera with a capture device, or a PTZ camera, depending on room size and how much movement is needed. Use a stable stand or mount so the framing does not change between classes.
The slides source
Slides usually come from a laptop or desktop. The easiest approach is to treat the slide window or a second monitor as its own source in your switching software. A wireless clicker lets the teacher move through slides without touching the keyboard.
The whiteboard source
You have two common options:
- Digital whiteboard: A pen tablet, pen display or interactive panel can send handwriting straight to the computer as a screen or window source. This is often the cleanest option for online teaching, since the writing stays sharp.
- Physical whiteboard: A camera pointed at a board works too, but it needs good lighting without glare and a dedicated camera angle.
For most virtual classes, a pen tablet or pen display is easier to manage than a physical board.
Which switching method should I choose?
There is no single right answer. It depends on the teacher's comfort, the number of classes and whether you have a helper.
| Method | How it works | Best for | Things to consider |
|---|---|---|---|
| Software scenes (e.g., OBS-type tools) | Each layout is a saved "scene"; switch with hotkeys or a controller | Solo teachers, coaching institutes, creators | Needs a reasonably capable computer and some one-time setup |
| Hardware video switcher | Cameras and computers connect by HDMI/SDI; buttons switch the output | Busy studios, multiple cameras, operator-led classes | More equipment to plan and wire |
| Platform screen share only | Teacher shares a window in the meeting tool | Very simple classes | Switching can be clumsy and may interrupt the flow |
| Operator-assisted | A second person switches while the teacher teaches | Large programmes, live events, hybrid classes | Needs a trained person and clear cues |
If you are unsure, software scenes are a practical starting point, and you can add hardware later as classes grow.
How do I build scenes that match how teachers actually teach?
Fewer scenes are better. Most lessons work with four to six saved layouts, for example:
- Teacher full screen: for introductions, discussions and doubts.
- Slides full screen: for content-heavy explanations.
- Teacher + slides: slides large, teacher in a small corner.
- Whiteboard full screen: for solving problems and derivations.
- Teacher + whiteboard: the teacher visible beside the writing area.
- Break or waiting screen: a simple holding screen with a logo and message.
Name each scene clearly, and keep the same order in every class. Teachers should not have to think while switching.
How can a teacher switch without looking at the computer?
The goal is to keep eye contact with the camera and attention on students. Some practical tools:
- Shortcut pad or macro keypad: Each button can trigger one scene. Label the buttons physically.
- Keyboard hotkeys: A free option, but easy to forget under pressure. Print a small cheat sheet and keep it beside the desk.
- Foot pedal: Useful when the teacher's hands are busy writing on a pen tablet.
- Tablet or phone controller: Some tools can be controlled from a second device placed near the teacher.
- Operator or producer: For larger or higher-stakes sessions, a helper in the control corner can handle switching.
Whatever you choose, practise it a few times before the first live class.
How should I lay out the studio?
A small, well-planned layout reduces mistakes.
- Teaching position: Place the teacher centrally, facing the camera, with the pen tablet or display at a comfortable writing height.
- Monitor placement: Put a preview monitor near the camera so the teacher can glance at the live output without turning away.
- Camera height: Keep the lens near eye level to avoid unflattering angles.
- Cable routing: Keep cables tidy and away from the teacher's movement path. Loose cables cause disconnections and trips.
- Control corner: If an operator is involved, give them a spot with a clear view of the teacher and the live output.
How do I keep audio steady while visuals change?
Audio problems disturb students more than a slightly imperfect picture. Treat audio as its own chain:
- Use a dedicated microphone, such as a lavalier, headset or a good desk or shotgun mic, rather than relying on the laptop mic.
- Send the same audio to the stream or meeting at all times, whichever scene is active.
- Use headphones for monitoring if the setup involves live student interaction, to avoid echo.
- Test levels with a real lesson voice, not just a quick "hello".
Basic room acoustics also help. Soft furnishings, acoustic panels or curtains can reduce echo in bare rooms, and a quiet location away from traffic noise makes a big difference.
How should lighting support all three views?
Teachers look at the camera, at the screen and at the writing surface. Lighting should work for all three.
- Use soft, front-facing light on the teacher, ideally from slightly above eye level.
- Avoid strong light directly on screens and pen displays, which can cause glare.
- If using a physical whiteboard, light it evenly from the sides to reduce reflections.
- Keep the colour temperature of your lights consistent so skin tones don't shift.
What mistakes should I avoid?
- Creating too many scenes that the teacher cannot remember.
- Using unlabelled shortcuts or changing them between classes.
- Depending on the laptop's built-in mic and speakers.
- Letting notifications pop up on a shared screen. Turn on "Do Not Disturb" before class.
- Skipping a test run with the actual meeting or streaming platform.
- Forgetting a backup plan, such as a spare cable, a second mic or a mobile hotspot.
FAQ
Can one teacher run the whole setup alone?
Yes, in most cases. With saved scenes and a shortcut pad or foot pedal, a trained teacher can switch smoothly without help. For long sessions, large audiences or multiple cameras, an operator can make it more relaxed.
Do I need a pen tablet for the whiteboard view?
Not always, but it is often the most convenient choice for online teaching. A pen tablet or pen display lets the teacher write naturally while the writing appears clearly on screen. A camera on a physical whiteboard is an alternative if the teacher prefers it.
Will this work with Zoom, Google Meet or Microsoft Teams?
Generally, yes. Switching software can usually output a virtual camera that meeting platforms can select as a video source. The exact steps vary by tool, so test the full chain before the first class.
If you are planning a virtual class studio for your school, coaching institute or teaching business, Smart Infovision can help you plan the layout, equipment, lighting, audio and switching workflow around how your teachers actually teach. Request a studio quote from Smart Infovision to get started.
 Related setupExplore Virtual Class Studios )}
Quote
Request your studio quote
Tell us about your room and the studio you have in mind. The Smart InfoVision sales team will get back to you to plan the next step.
Helpful to share
- Your name and city
- The studio type you have in mind
- Room size and layout
- Equipment you already own
- Budget and timeline, if you have them